I’ve been looking at breaking out the ATMEGA328P-PU chip (that is used in many Arduino boards) to be able to reduce the footprint and power consumption of the boards. This post will show you how to make your own Arduino. WOOP!
NOTE: I had a look through this post again when I was looking at deadbugging an ATTINY chip. The information here is still relevant so I’ve bumped it! Let me know if you make your own shrimp!
NOTE: Updated June 2015: I was at a Makerfaire on the weekend, and had a chance to talk to shrimping.it who I referenced in this original post a few months back. It was there that I read about how to do it and they are selling kits at super low prices http://shrimping.it/blog/kits/ so that is a really easy place to start if you’d like a low costs kit that can arrive pretty fast! It’s a great way to get started quickly to make your own Arduino for a very low cost.
There are some amazing shrimping guides already out there and I would recommend having a read. If you do want to read more, I’ve included some links at the bottom of this post.
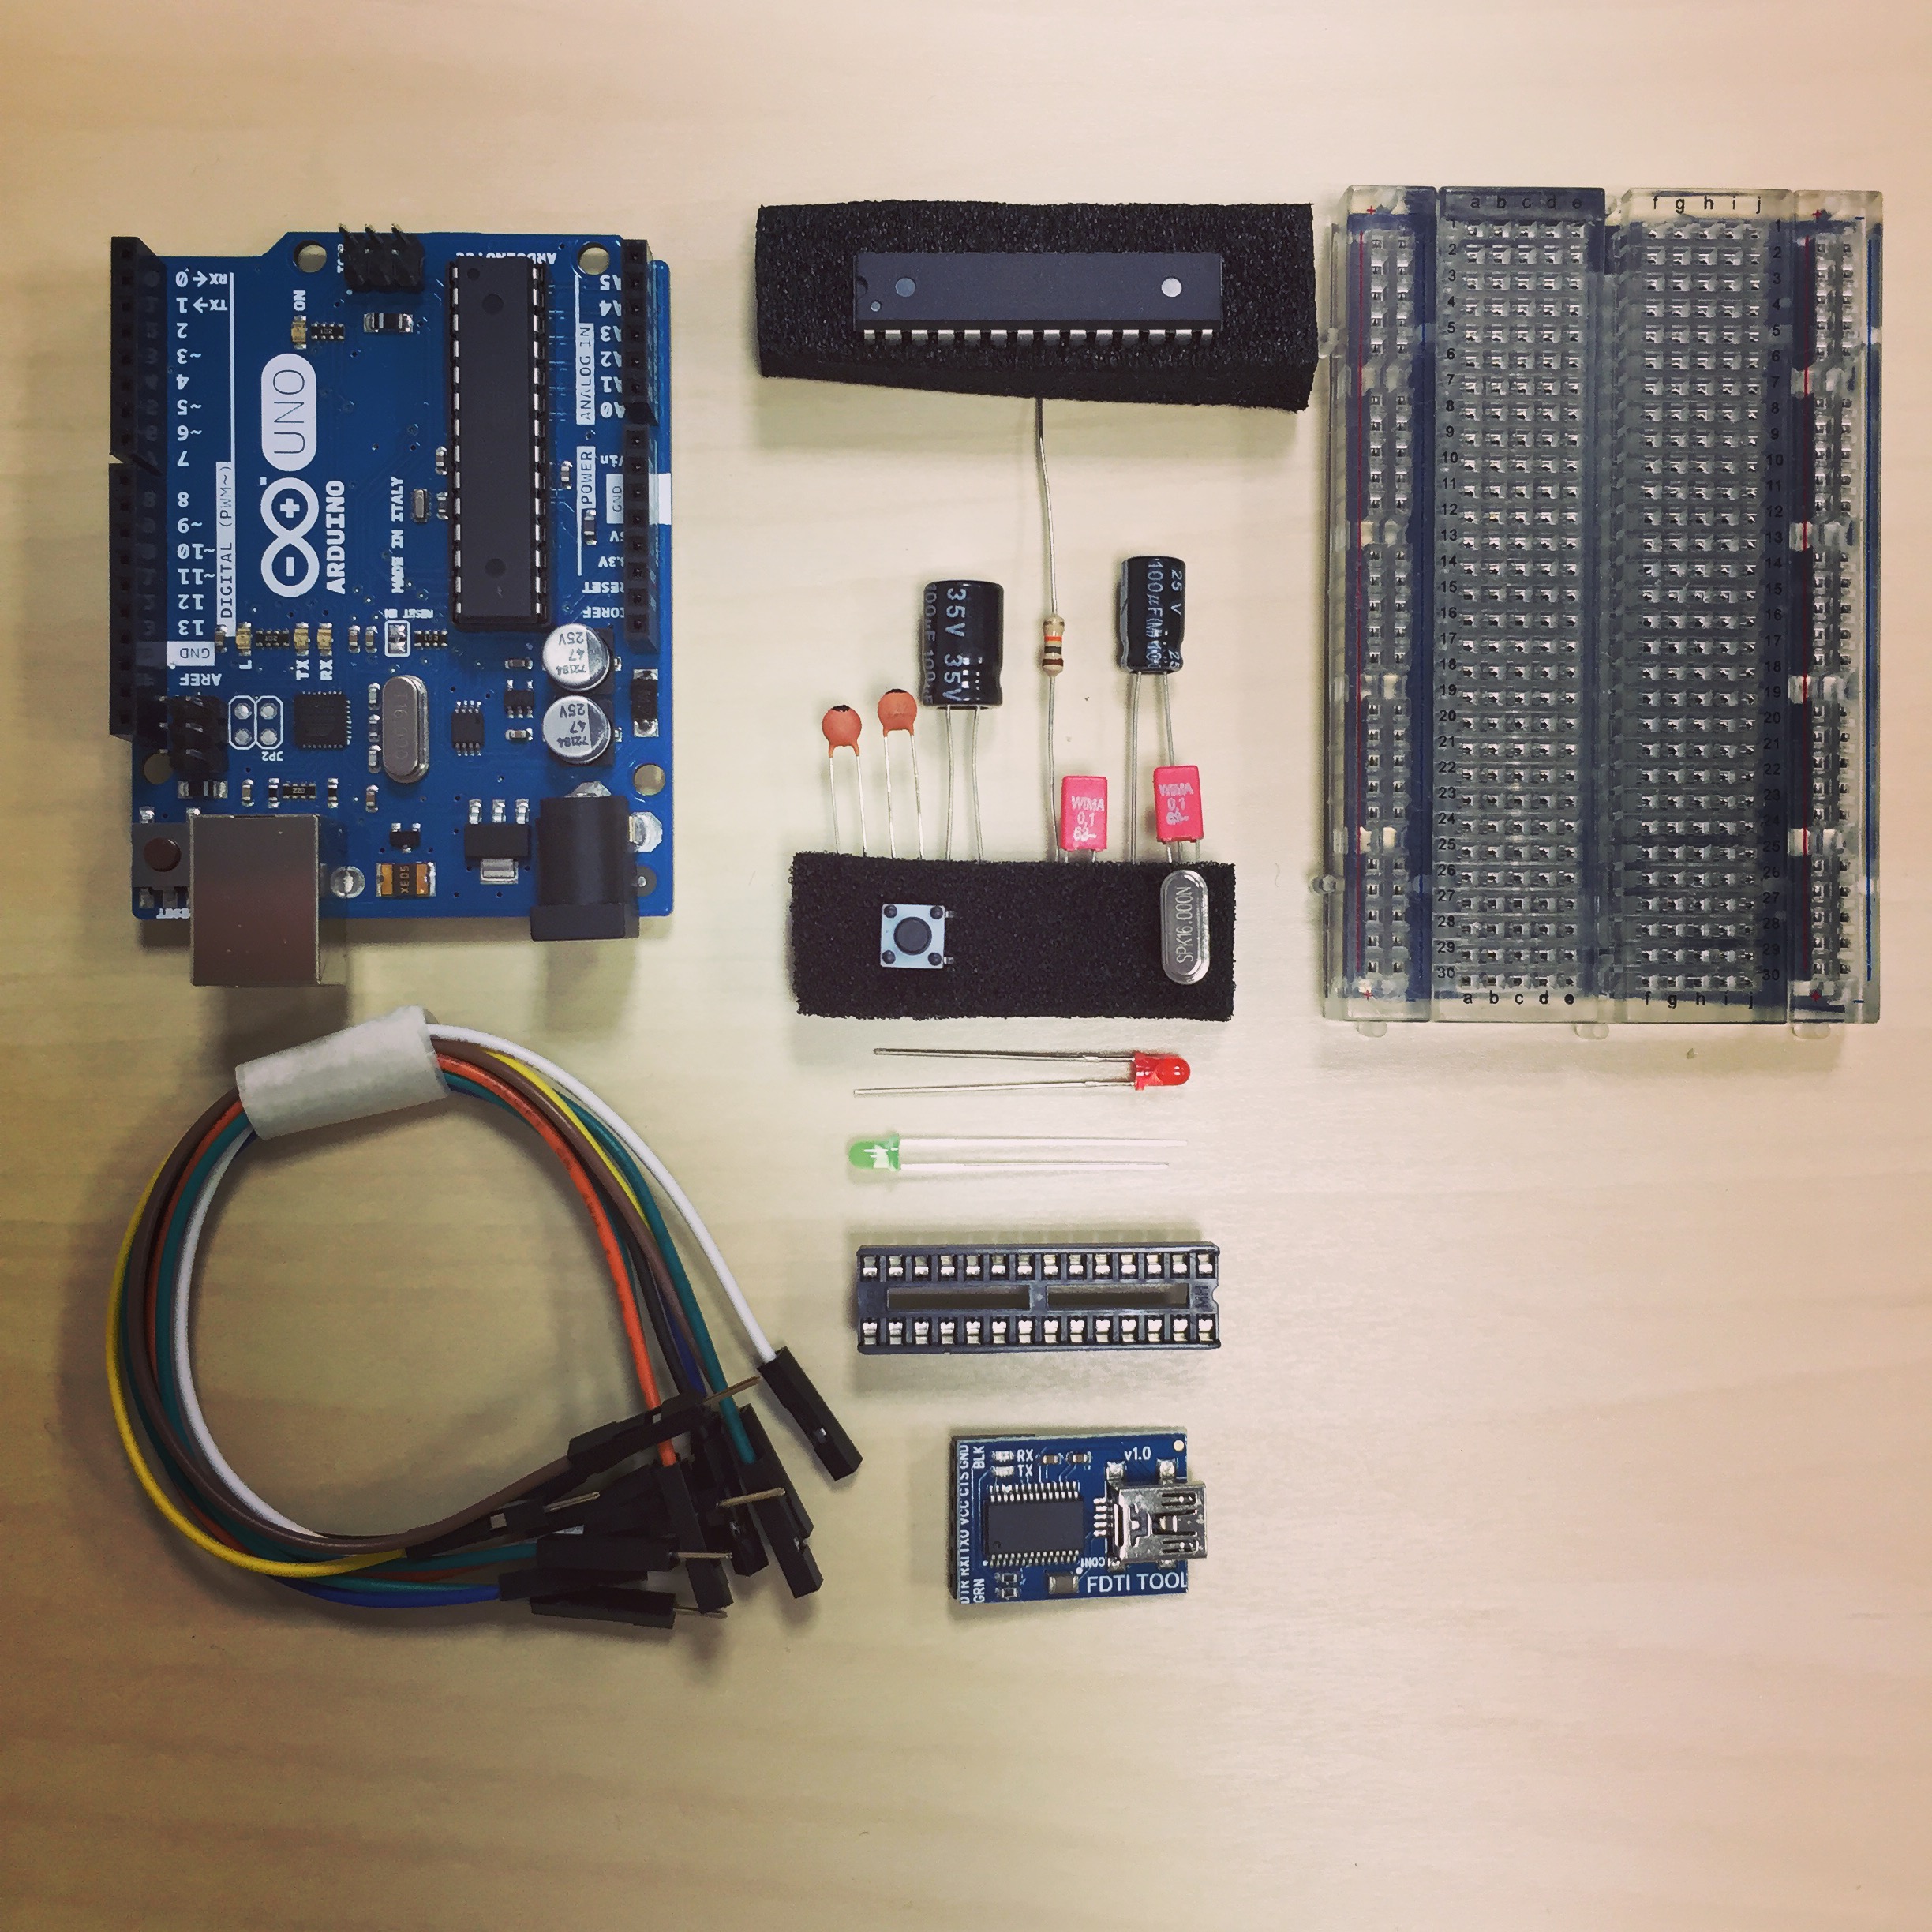
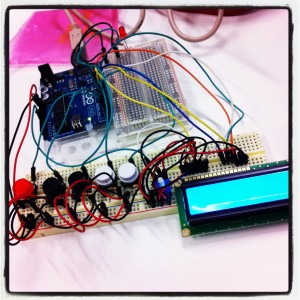
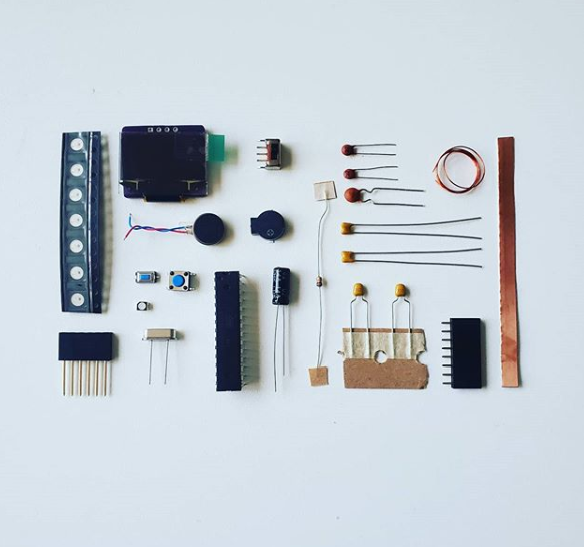
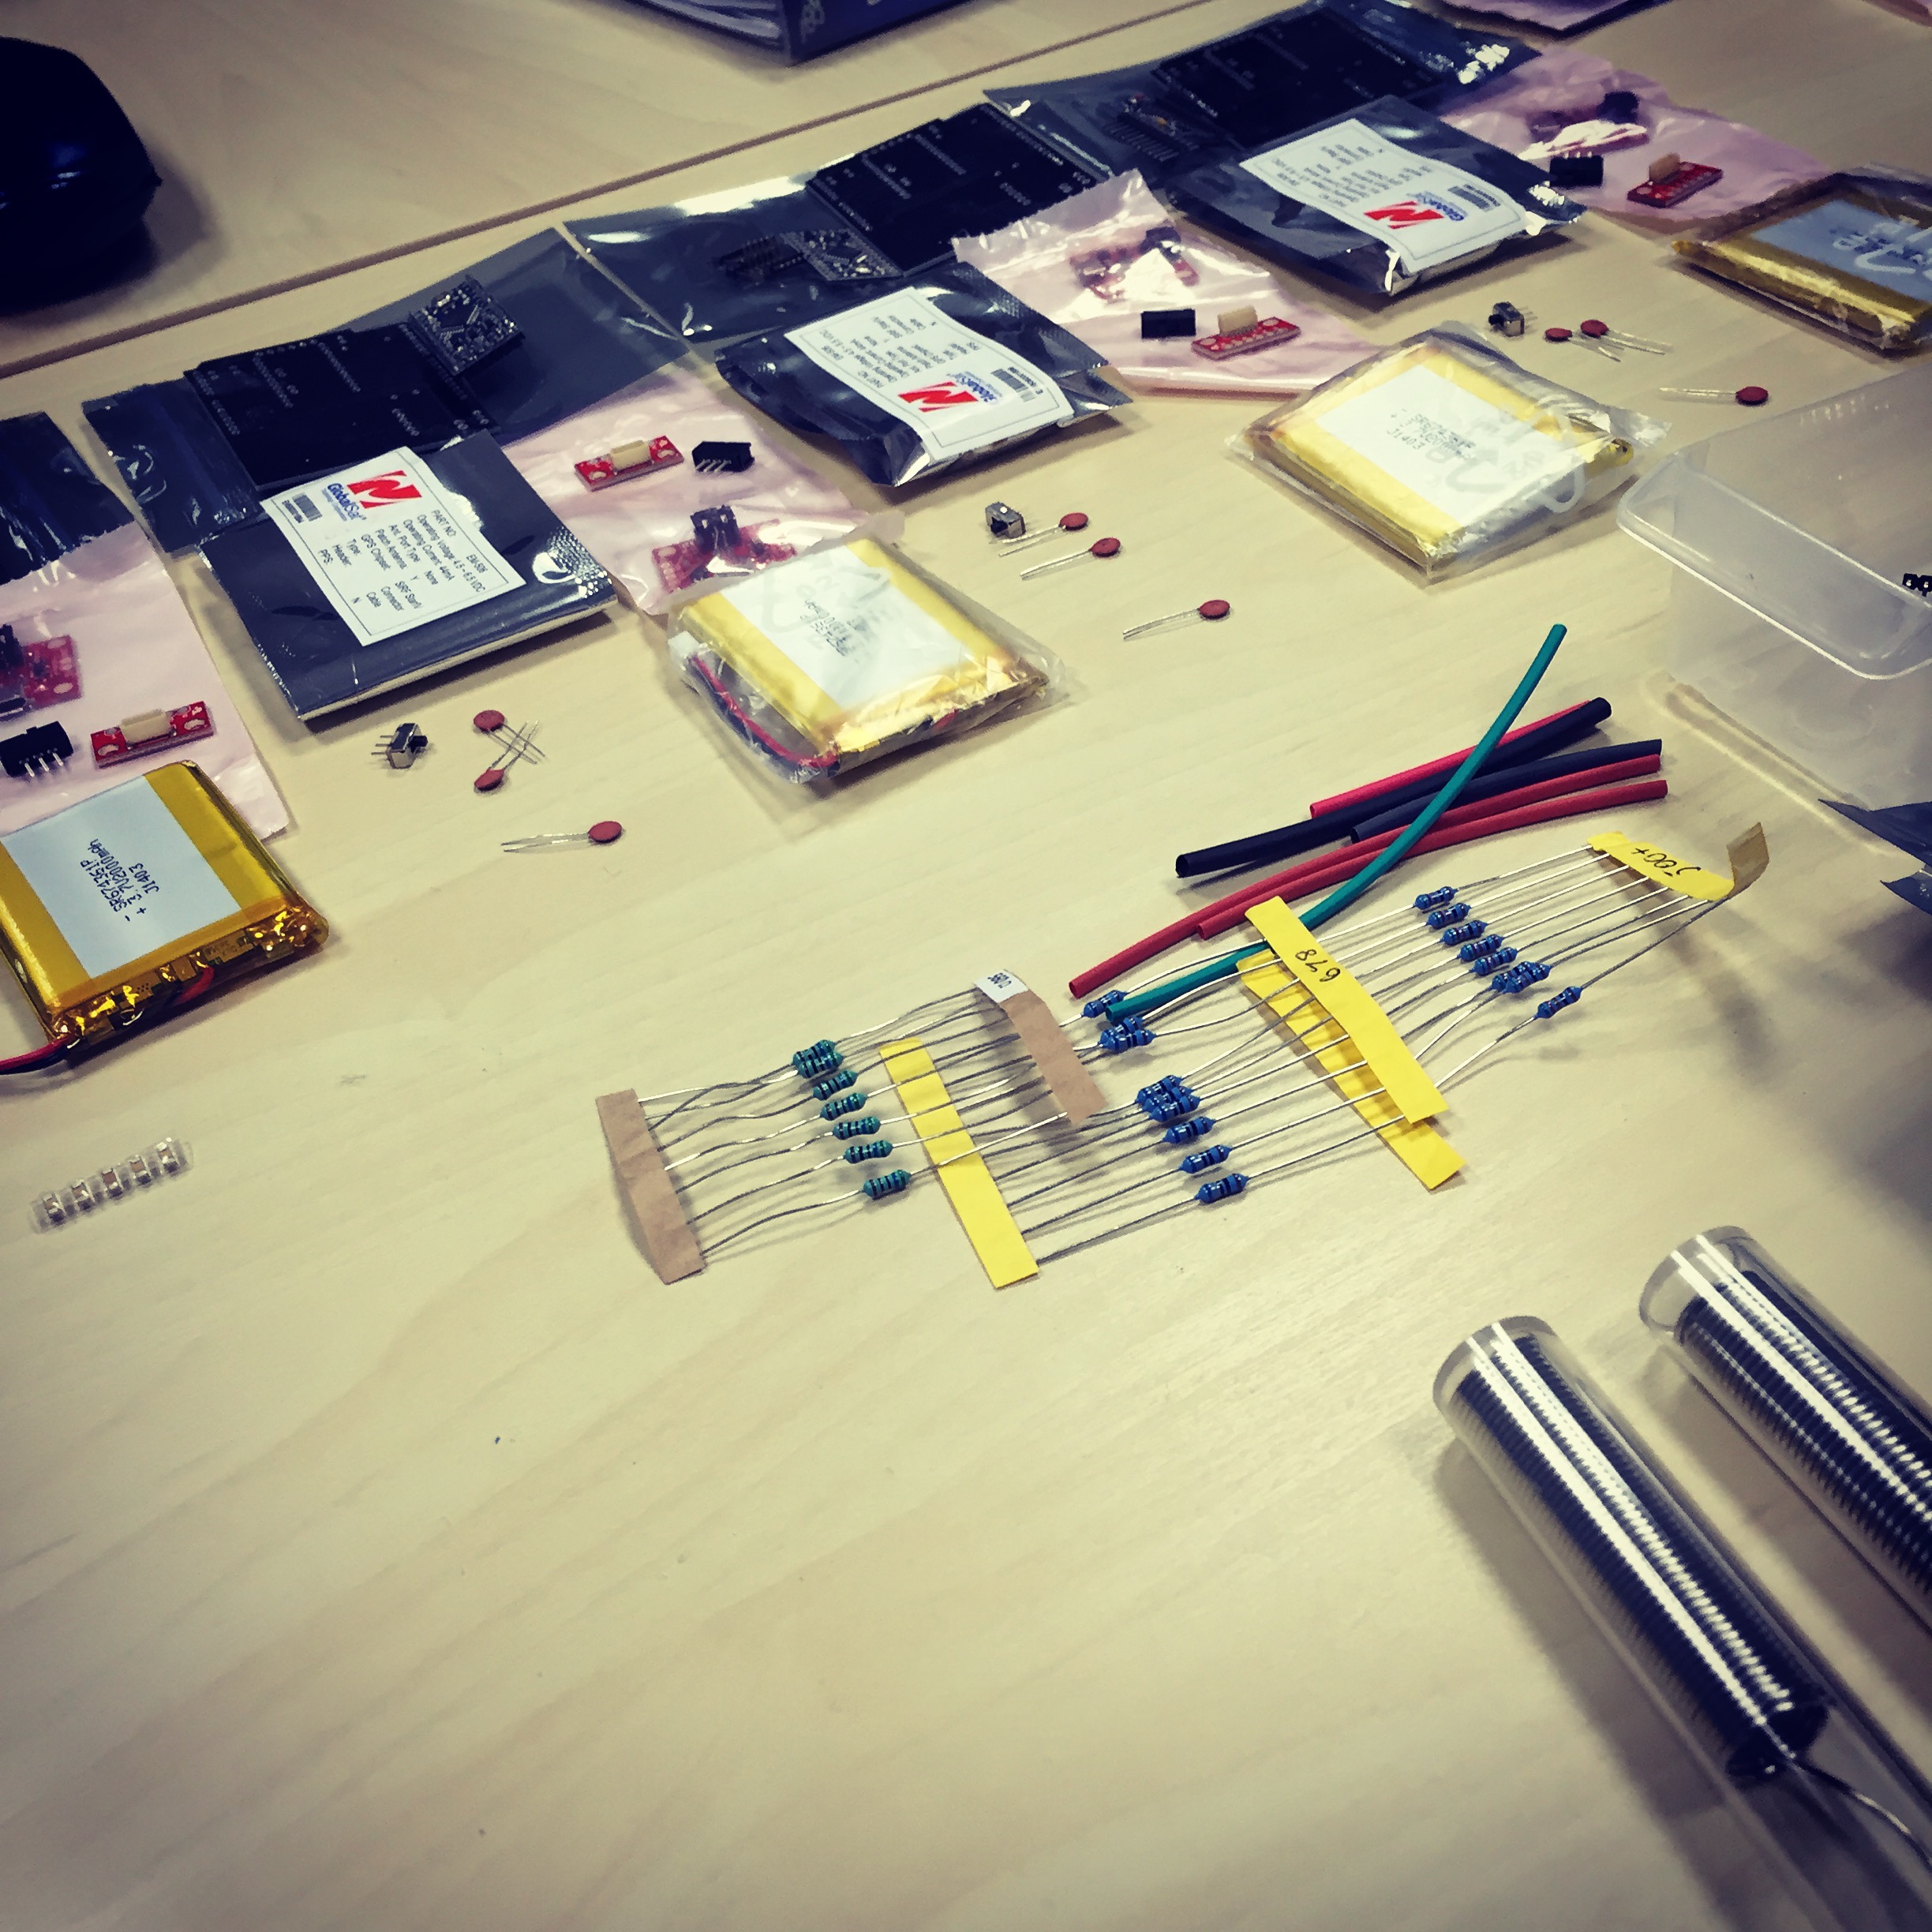
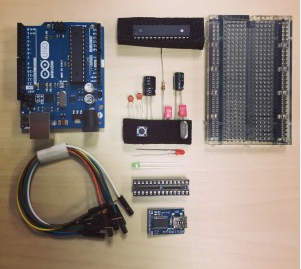
The components needed to make our own low cost arduino. It’s cheap and also fun to do!
There are a few steps to follow and I’ve put together a parts list of the components that I used.
Burn the Bootloader: Parts needed
To burn the Bootloader I used these parts:
- Arduino Uno; to use as an In-System Program (ISP),
- 16 MHz crystal
- 10k resistor
- two 22 picofarad (ceramic) capacitors
For the completed working break up Arduino I used:
- Arduino Uno; to use as an In-System Program (ISP),
- 16 MHz crystal
- 10k & 550 resistor (it may be cheaper over time if you buy a resistor kit)
- two 22 picofarad (ceramic) capacitors
- 1 x ATMEL328P-PU IC
- 1 LED
- Jumper Wires (variety of colours, red / black / blue / green / yellow)
Assumptions are that you have programmed an Uno before and understand connecting it to your computer. You will also know about selecting the board and port from the menu to be able to upload your code. (If not you might need to have a look at a starter / basics tutorial to get this started.)
Let’s make an arduino!
PART A: Uploading the Bootloader to your chip
1 Arduino ISP
We will use the Arduino Uno as our Programmer for the chip. Connect your Uno to your computer, select the Uno board and your correct serial port from the Tools menu.
Upload the ArduinoISP sketch to the Uno.
File > Examples > ArduinoISP
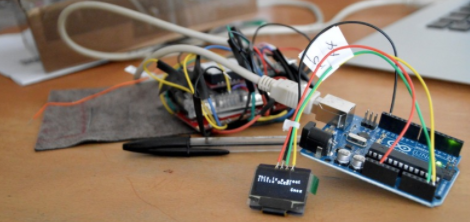
2 Hook up
Now hook up the ATMEGA328P-PU chip
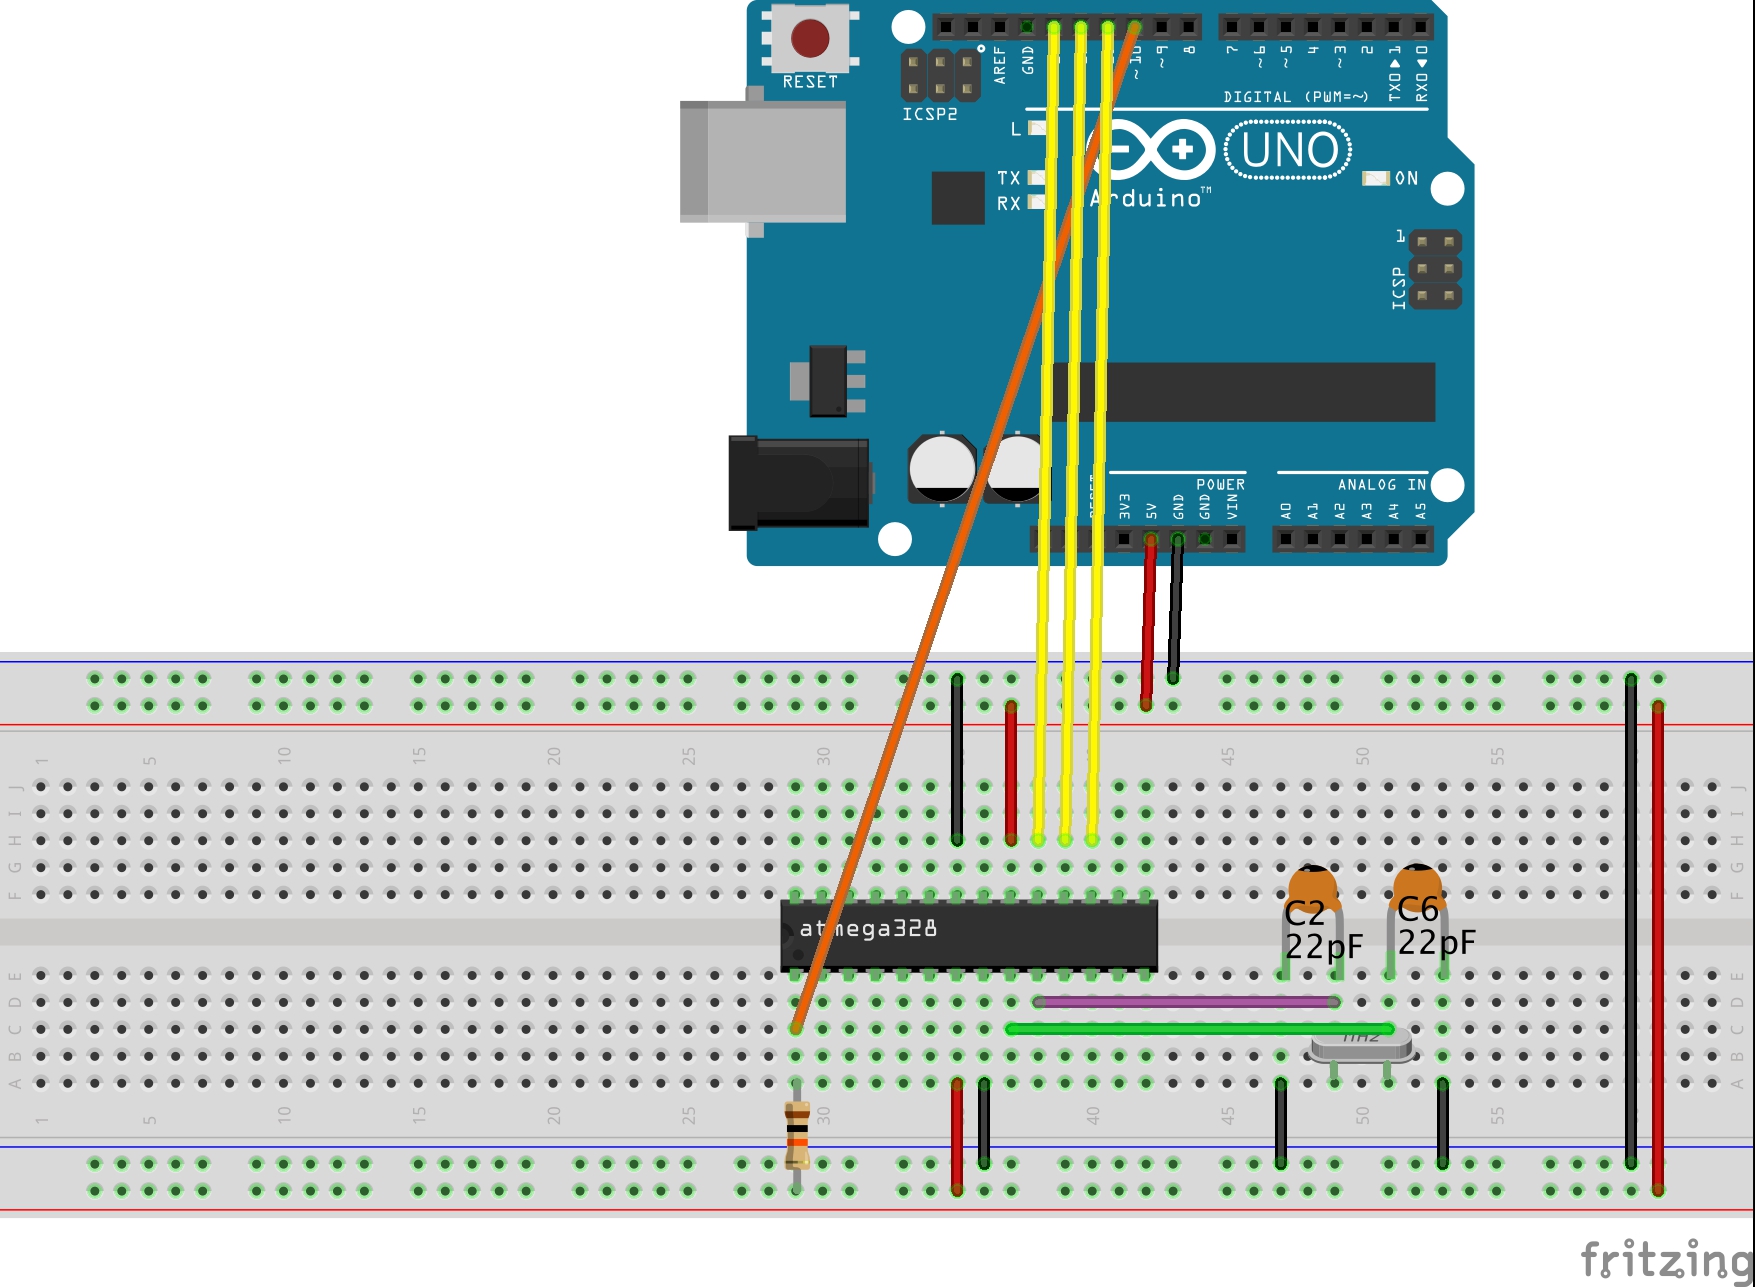
Hook up for burning the boot loader on to the chip – do this AFTER you have uploaded ArduinoISP on to your Uno.
3 Board Selection
To upload the bootloader to the chip change the board to “Arduino Duemilanove or Nano w/ ATmega328” from the Tools > Board menu.
Make sure from the Tools menu, you selected Arduino as ISP

Then select Tools > Burn Bootloader
There should be a message in the console when successful; Done burning bootloader.

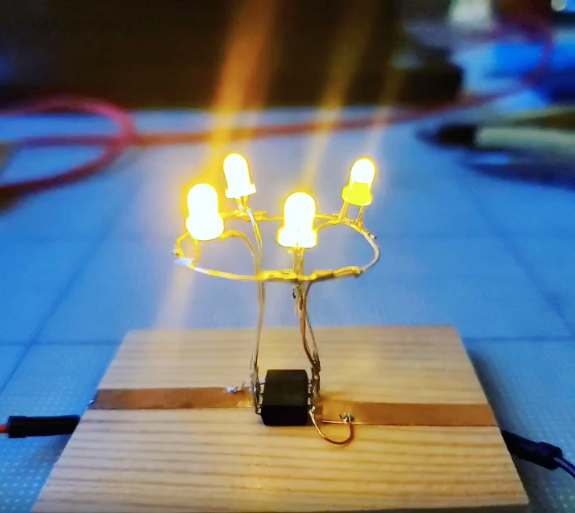
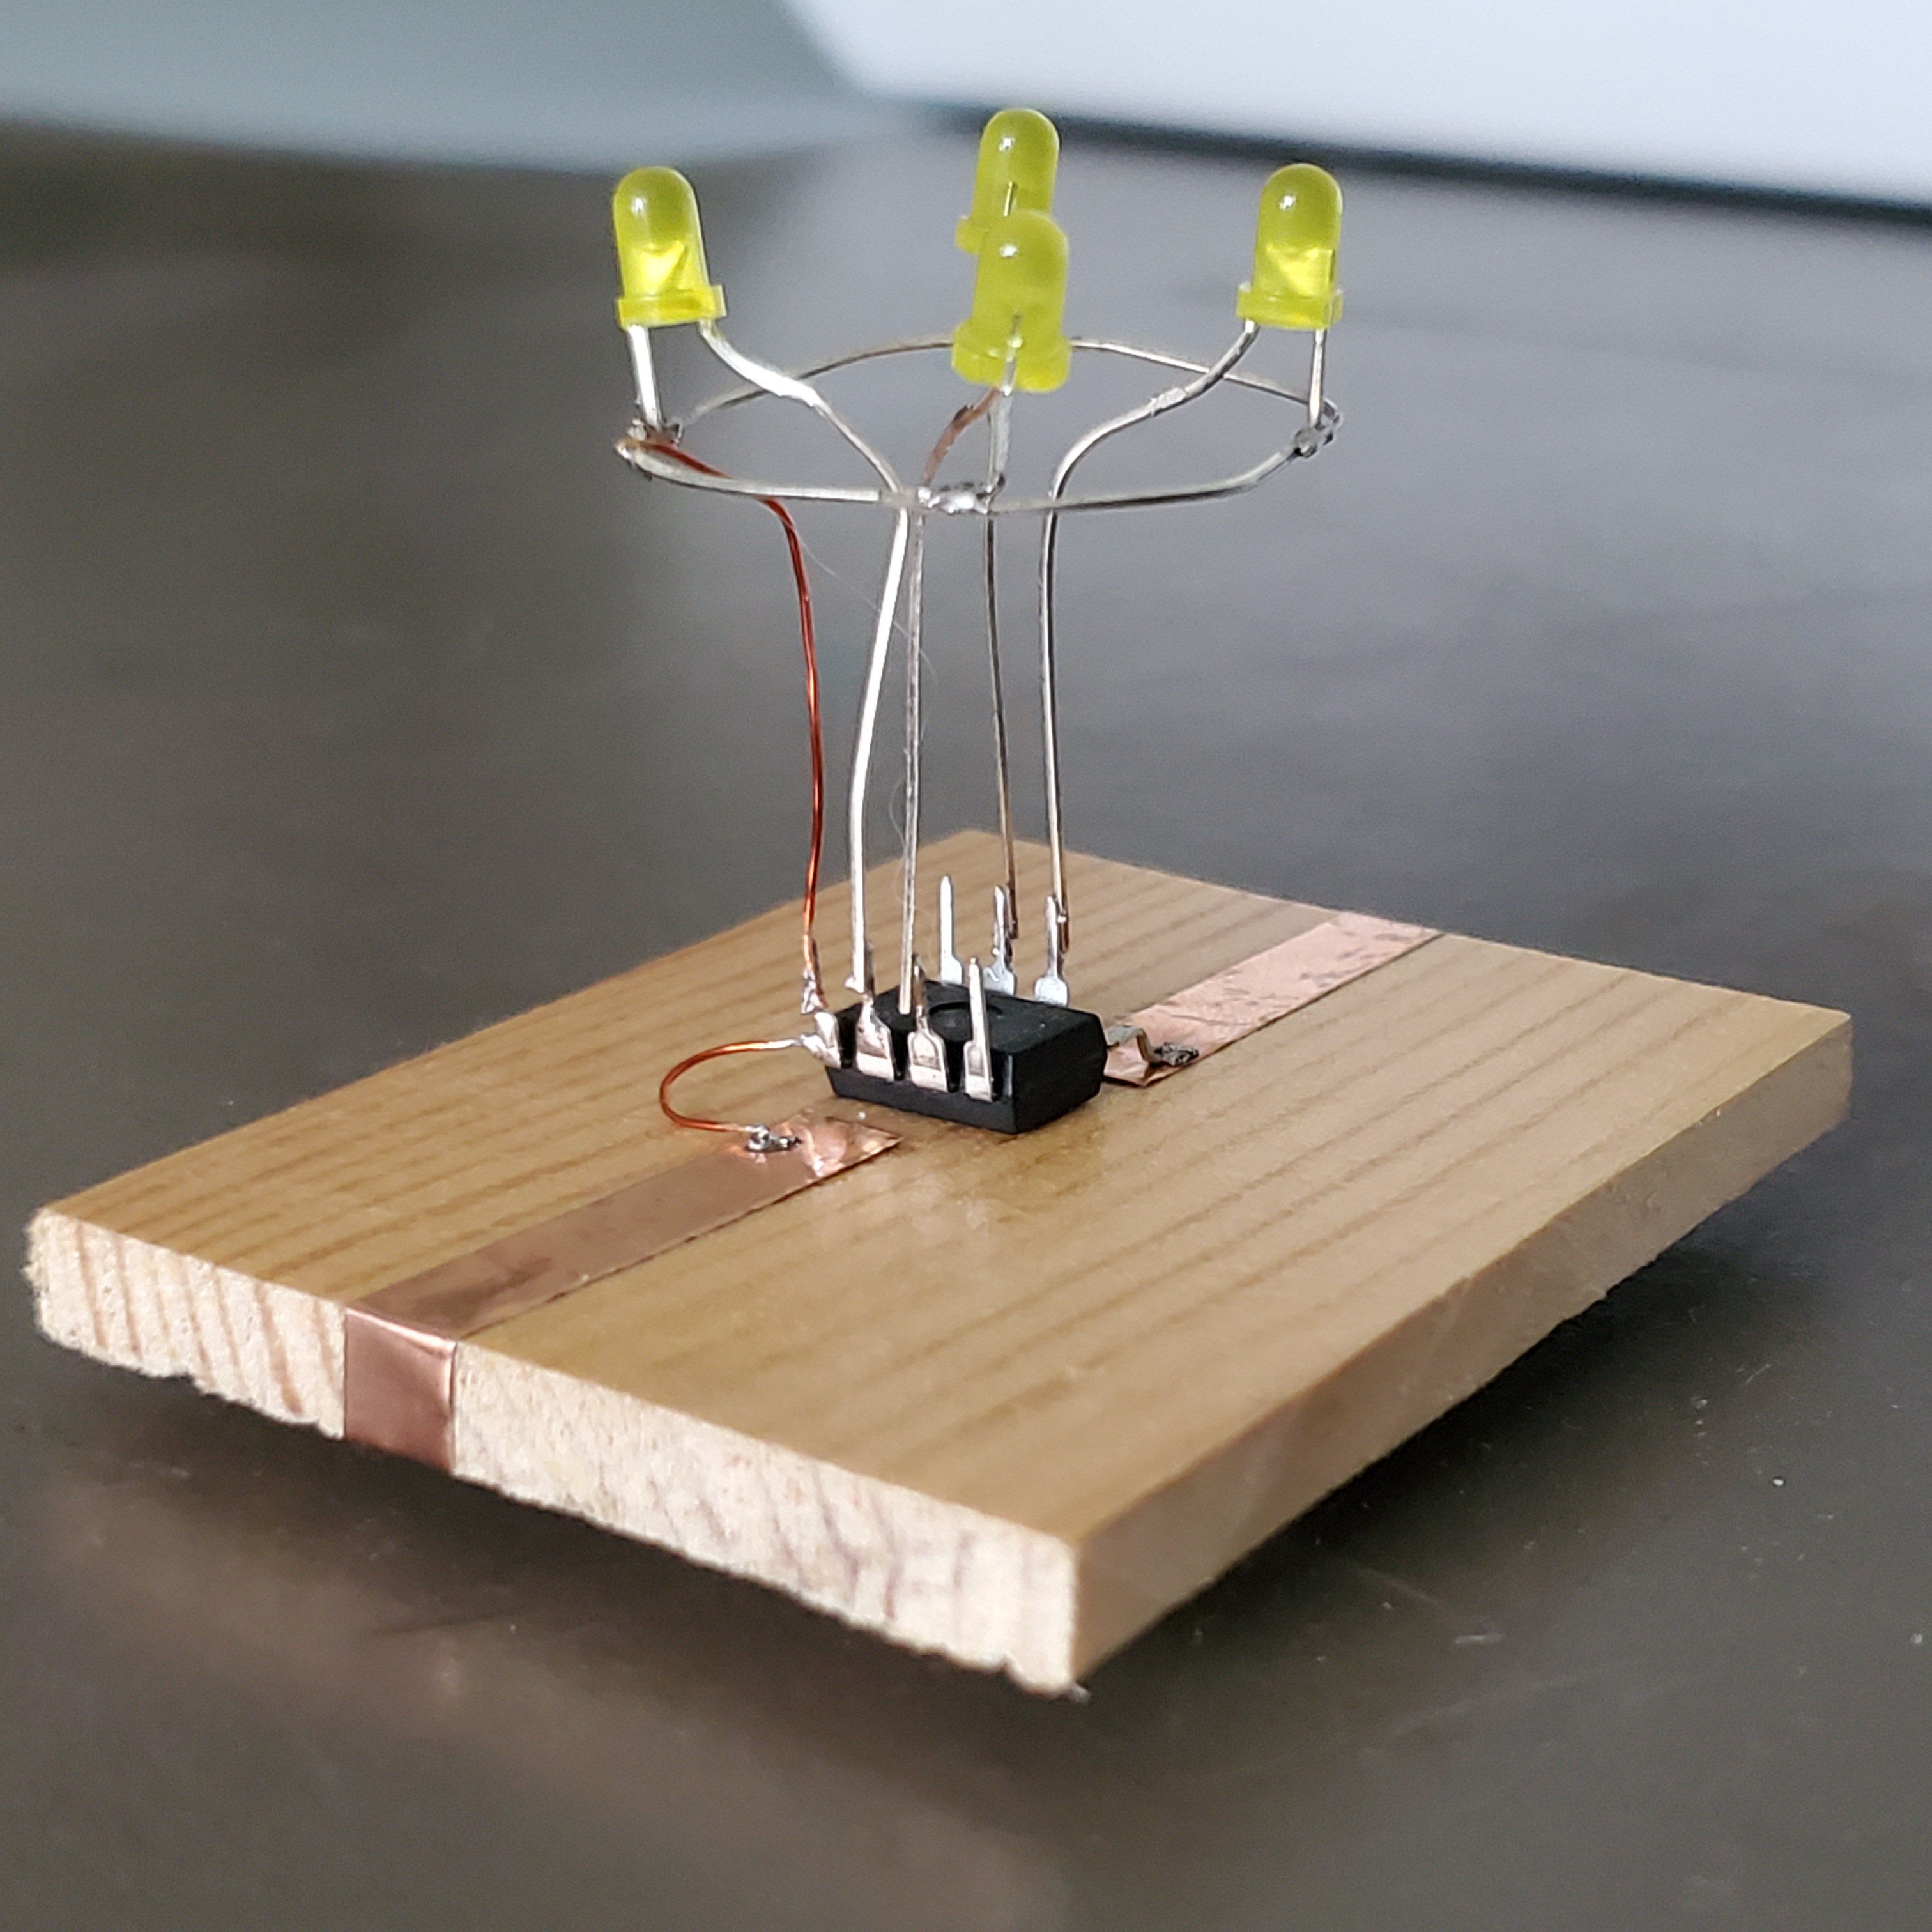
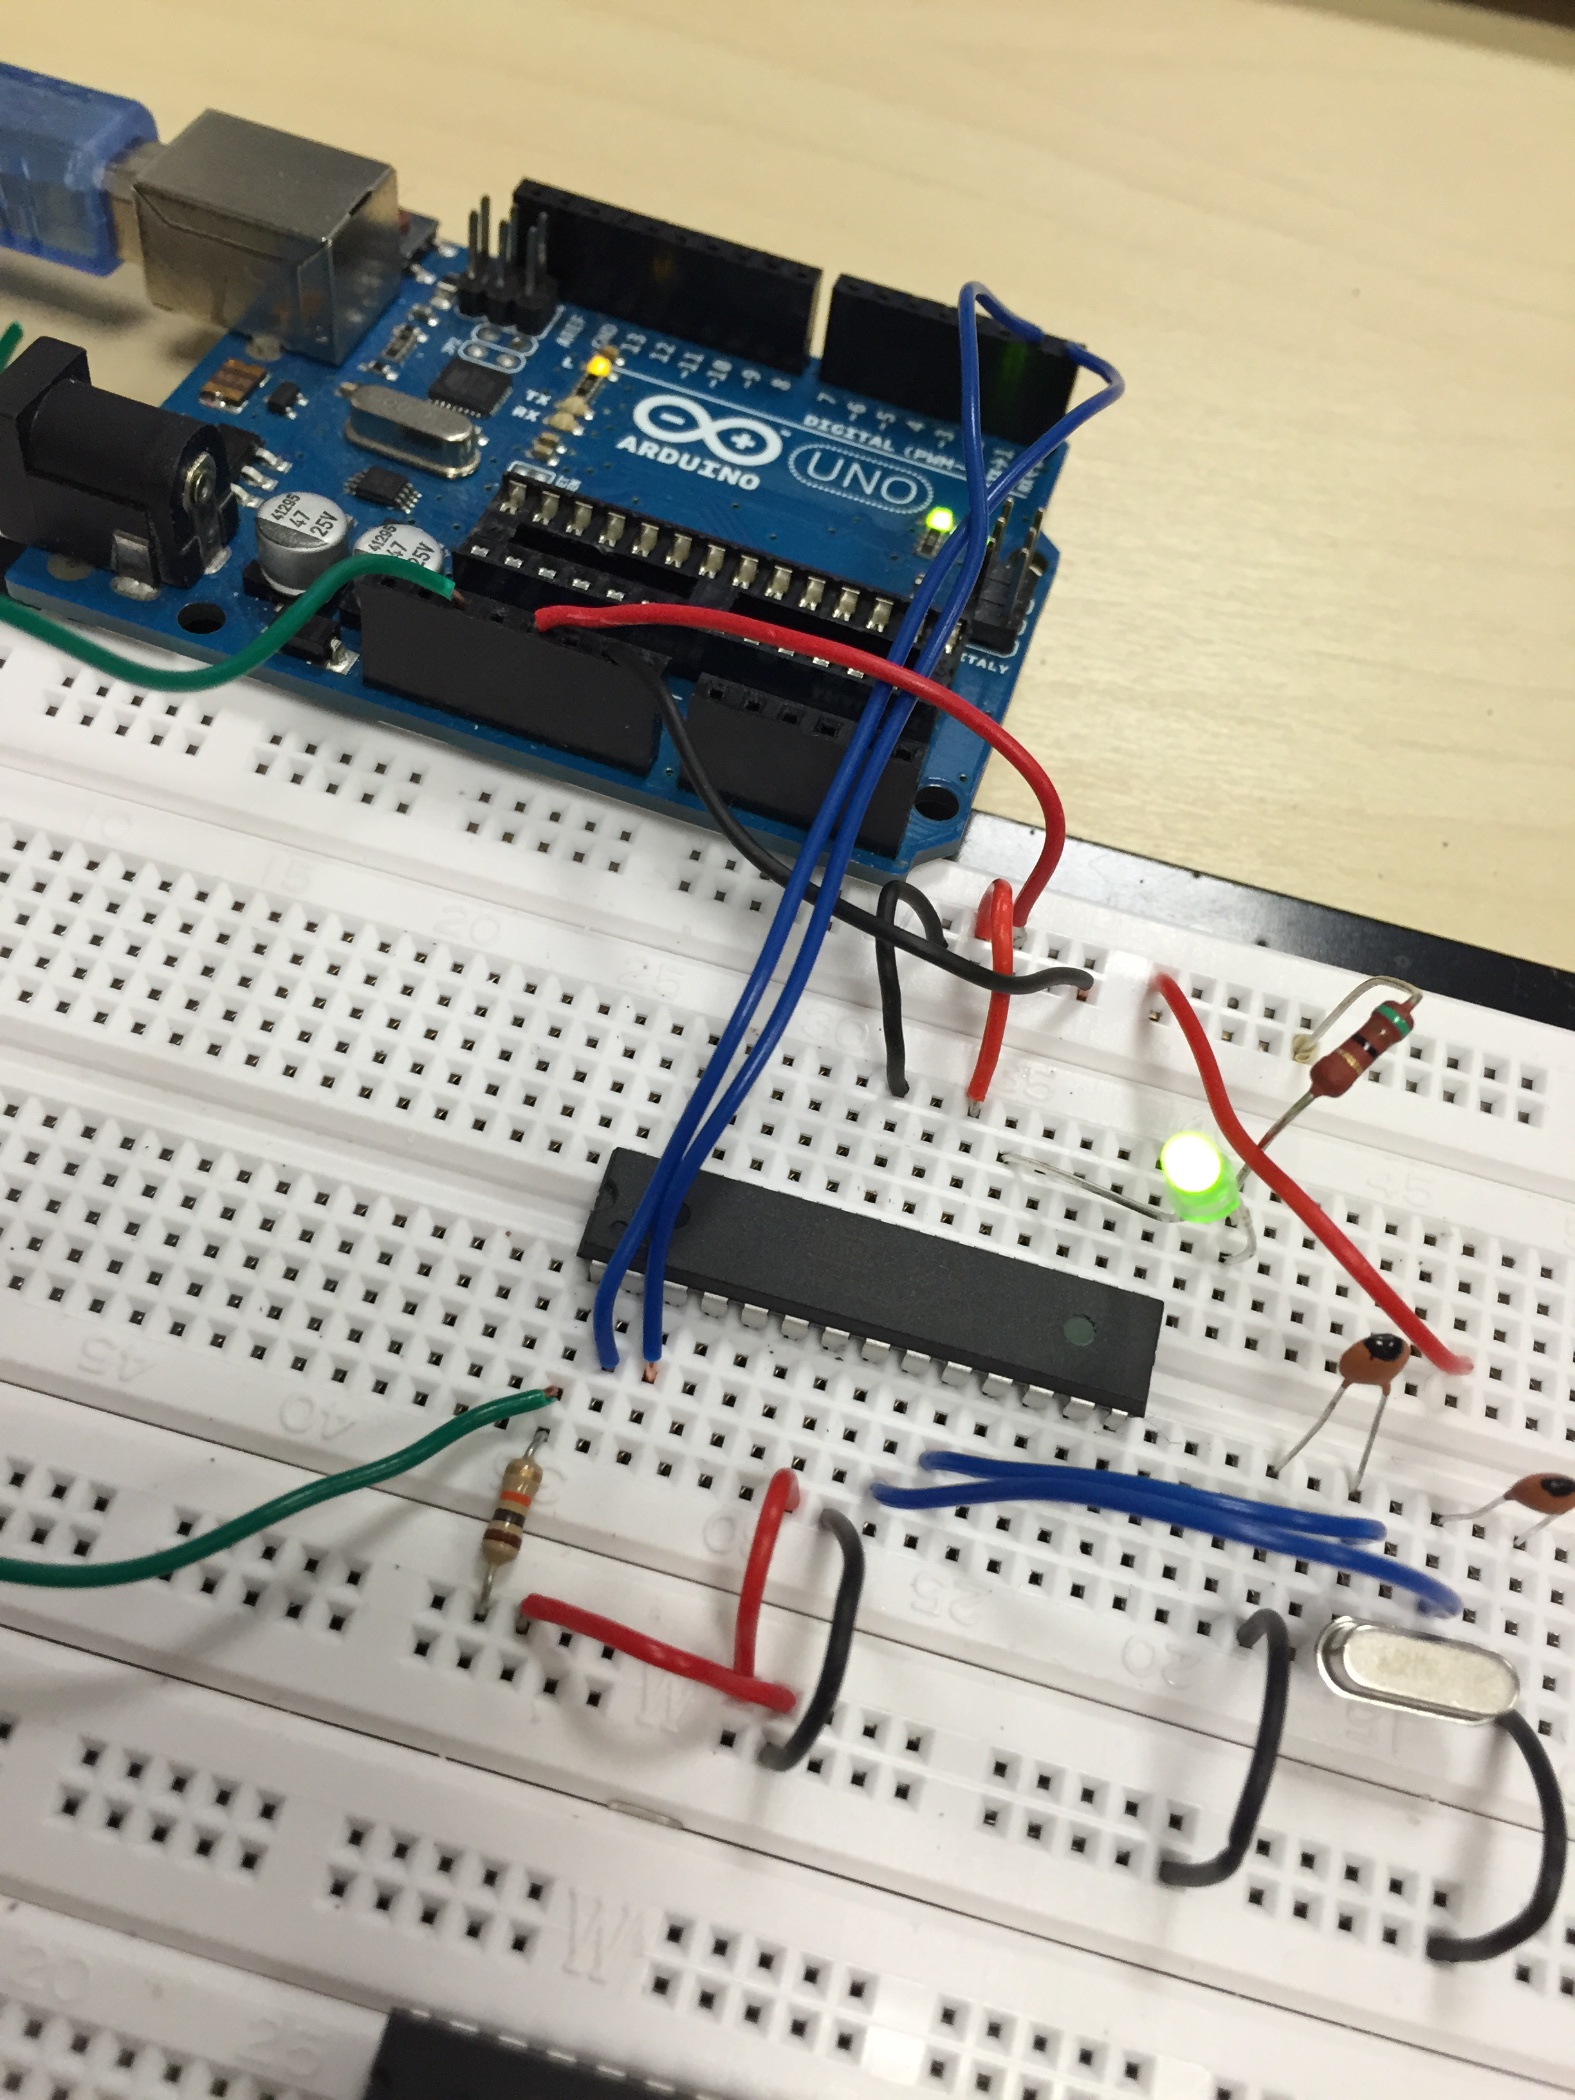
You don’t need to do this next step but I found it useful, just to hook up 3 LEDs so you have some visual feedback. If you are used to seeing the LEDs flickering on the Uno when you upload the code, you can do the same for the chip.
Optional hookup Pins (and resistors):
9: Heartbeat – shows the programmer is running
8: Error – Lights up if something goes wrong (I used red)
7: Programming – In communication with the slave
You should now have the Arduino Bootloader on your board.
[su_box title=”Note” box_color=”#2fcce2″]
Possible errors:
Check your chip is the correct way around – which way is the little semi-circle groove facing?
Do all the correct areas have Power and Ground?
Have you selected the correct board / or tried the alternative from the list?
[/su_box]
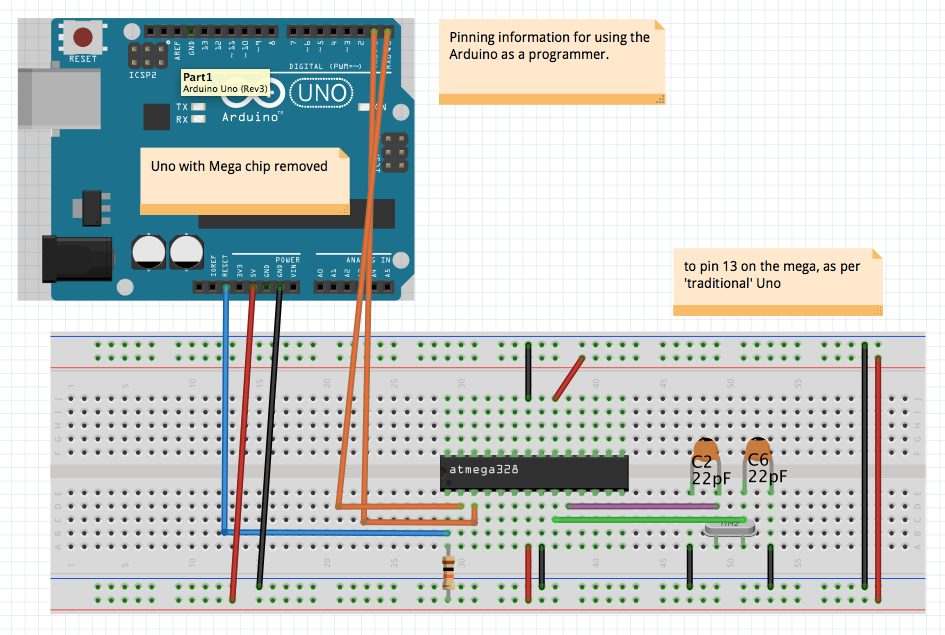
PART B To upload your Code
Now the Arduino needs rewiring (I used a different board so I could keep the wiring and chip on the first Uno, so if you have 2 or 3 Uno boards then it makes life a little easier) – first make sure the chip is removed from the Arduino Uno Board.
Note that the only things necessary to connect are the Rx and Tx from the Uno to the Rx and Tx of the Chip (note: typically these are reversed for communication but for this set up these are not reversed). You then also need your 16mHz Crystal as before as well as those 22pF Capacitors, and the RESET on the Uno board to PC6 (PCINT14/RESET). Power & GND
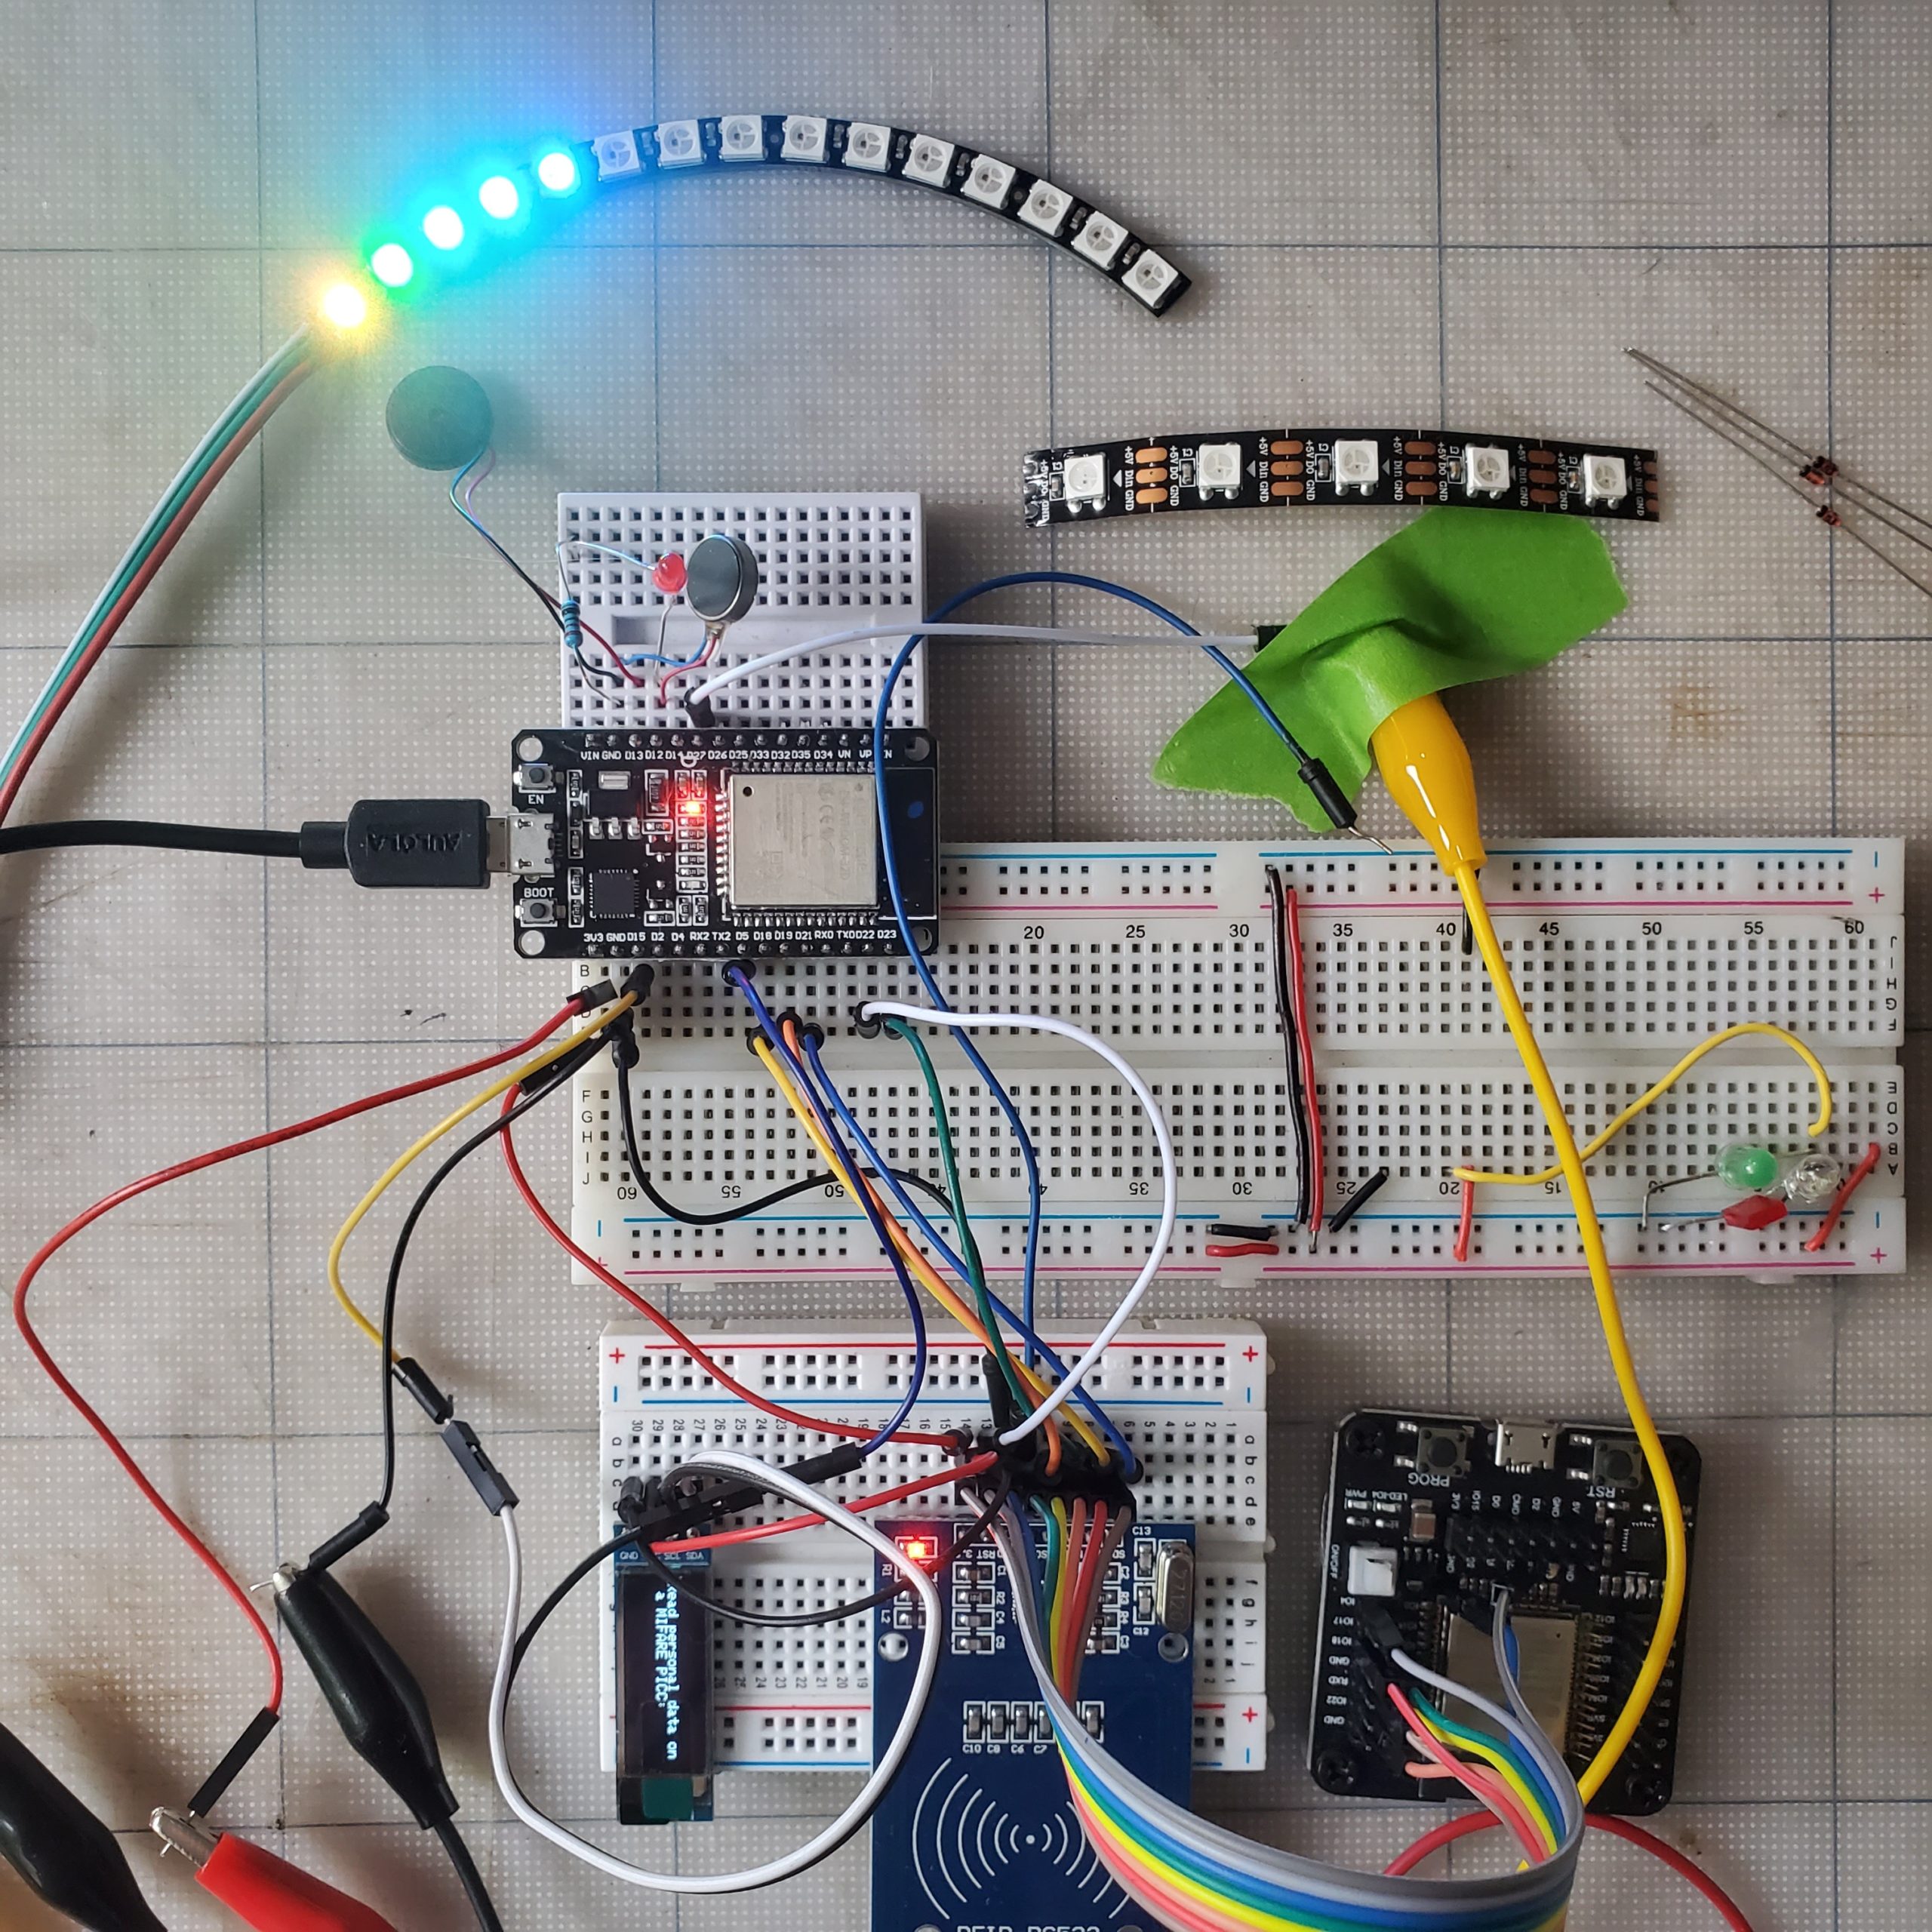
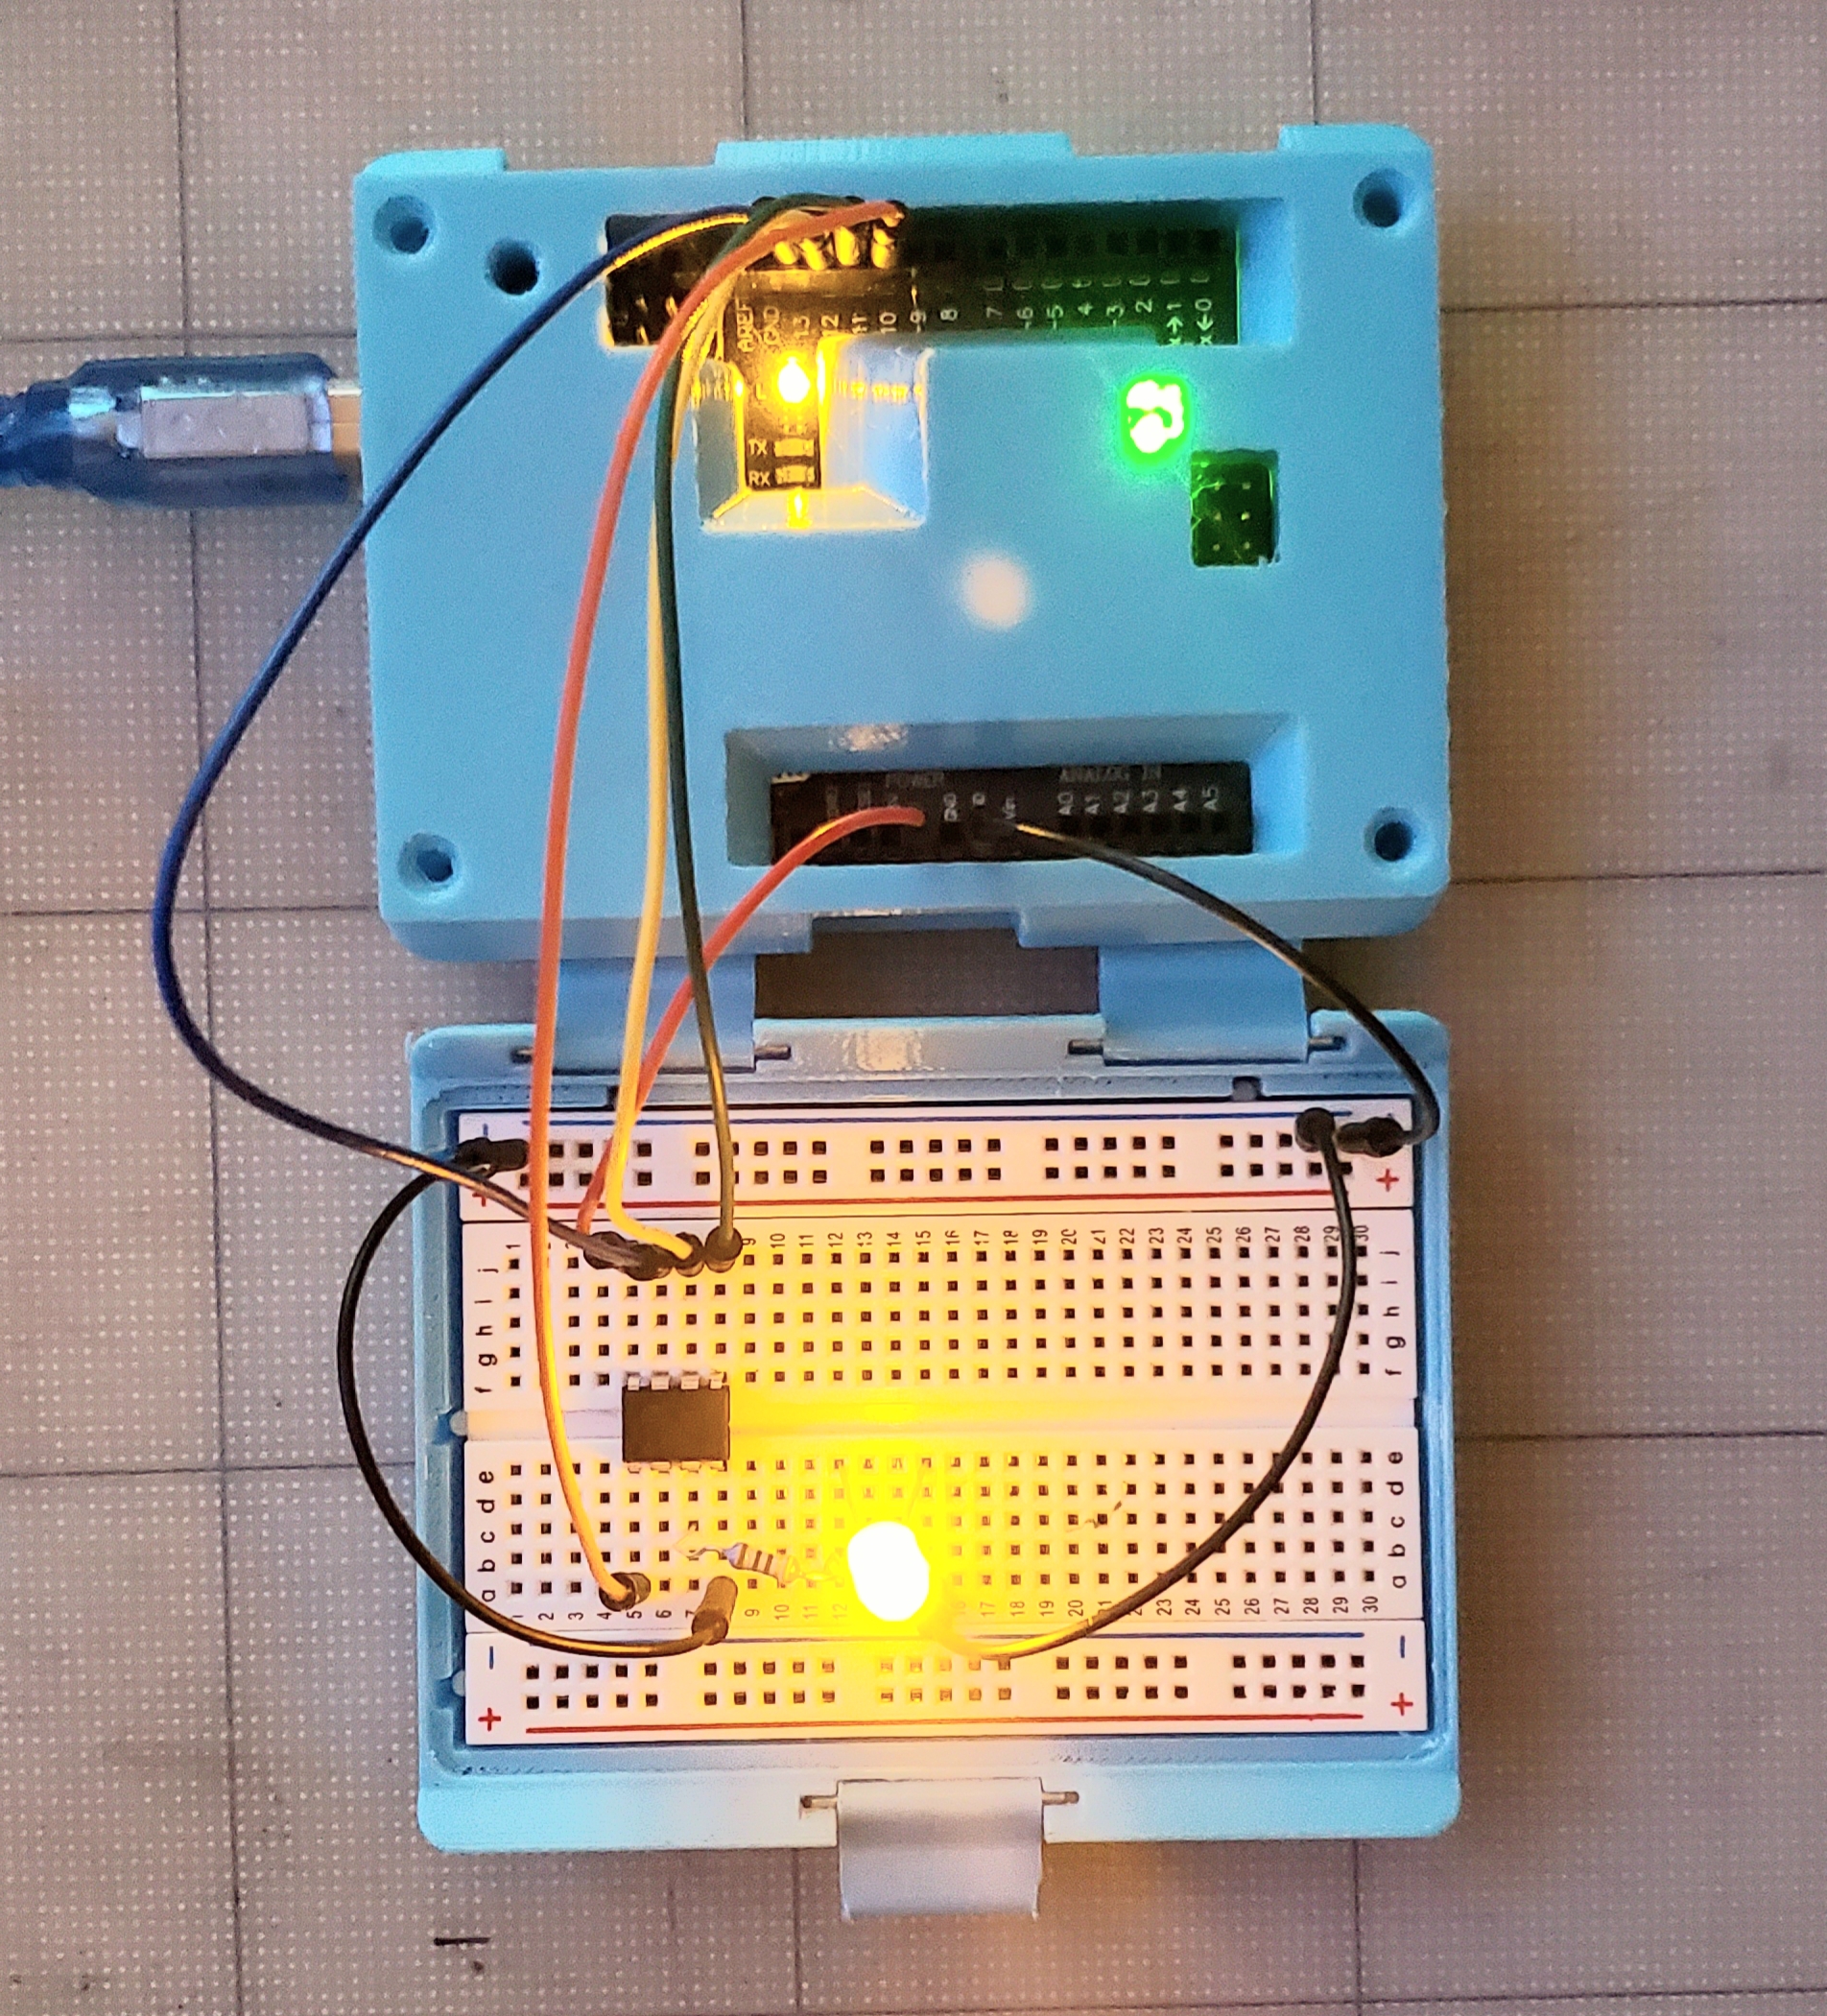
Connect the board to your chip on the breadboard.
Using the Arduino as ISP. Note – remove the ATMEL Chip from the Uno board!
Using the Arduino as a programmer.
Selecting the correct board
> and Arduino as ISP
> the correct Serial Port
Then it’s just a case of uploading your code! I hope you’ve decided to take the plunge to get this working. I know I looked up a LOT of tutorials and thought about it for a long time – even buying in the pieces for it and then still taking a long time to use them. Once I’ve done it now though, it was actually pretty straightforward and it’s a lot easier if you have a spare Arduino Uno dedicated to be the ISP for example as it can be difficult pulling out the chip that first time (without bending any pins oops).

Using an FTDI to upload code can also be done. (a USB to Serial (TTL level) converter which allows for a simple way to connect TTL interface devices to USB)
Have phun 😀 !
[su_note note_color=”#FDFD96″]
Sources & more information
http://shrimping.it/blog/shrimp/shrimpduino_stripboard_battery-2/
http://arduino.cc/en/Tutorial/ArduinoToBreadboard
[/su_note]